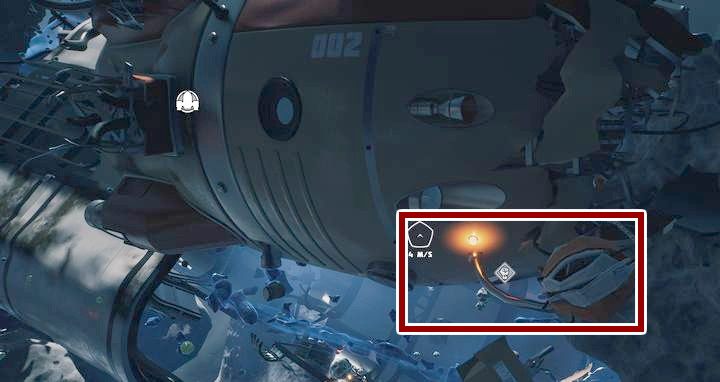

Large: Inside the intact Electric Sphere, with the electrical field blocking the entrance Medium: The Armoured Cylinder that you cut open with the Big Gun. Small: At the start of Chapter 2 – above the first Engineering ship, right next to the Oxygen Cylinder upgrade. Medium: In the base where you make your first airlock (Near the first Vacuum Cleaner) Small: In the armored Cylinder that you cut open with the Big Gun. Corridor: Near the first Engineering ship, there is a rectangular wreck a little way off and a little higher – towards the Molten rock / Big Gun / Military Base direction.Tube: Near the first Engineering ship, there is a rectangular wreck a little way off.
#Breathedge walkthrough series#
Go to the area with a series of empty metal rings, then look around for a spherical tank connected to a toilet by a Pipe. Toilet: In the Electrical area – to the side of a big wreck.Improved Communications: A small wreck between the Big Gun and Mayonnaise areas, fairly high up.Bed Compartment: A small Wreck Near the Big Gun, close to the bottom of the Armored Cylinder that you cut open.Kitchen Compartment: I think this was also near the Big Gun – from memory, it was near the side of the Armored Cylinder that you cut open?.Reinforcement Compartment: A Small wreck floating near the ship with the Big Gun – about level with the gun itself, in the direction of the Electrical area.Vehicle Bay Compartment: A Small wreck floating near the ship with the Big Gun – a bit higher than the gun, and in the direction of the Electrical area.Closet Compartment (Storage): A Small Wreck near the Big Gun.Solar Panel: In the Electrical area – look for a small rectangular wreck with panels all over it.Status Screen: Floating wreck near the big open area – between the first Engineering ship and the Big Gun / Military Base area.A blueprint / crashed Car is inside of the small asteroid. There is a small asteroid with a trail going to it. Go to the Bio Ship (with the Cow/Chicken Aliens) and look down towards the Electrical area. At the Electrical Area, right in front of a spherical wreck with two electrical arcs – there is a hollow asteroid with a Car wreck inside. Below the Mayonnaise Ship – there is a smaller rectangular wreck inside it, with a Car inside that. Space Car Blueprints: Required parts are 3.Inside the Armored Wreck that you cut open. Get the first Vacuum Cleaner near the Blue Tape area. Vacuum Cleaner: Available pieces are 4.Upgraded Flashlight: When leaving the first Engineering Ship and traversing the big open area towards the Big Gun / Military ship, it’s in a dark wreck down and to the left.Military Suit: Dead guy floating just to the right of the Military Base entrance.Between the Coolant area and the Electrical area, way down the bottom there is a piece of a big wreck with a little booster on the end. In the Coolant area there is a small wreck fairly low down. Obsolete Accelerator: At the Military Base there’s a person smeared against the side of a nearby wreck.You will see a coffin with some jets coming out of it. Large Accelerator: Right at the start of Chapter 2 – go out of the Engineering ship and lead down and left.The part is just on the other side of that asteroid. Very close to the above part – there is a nearby smallish asteroid. Near the Military wreck in one of the small wrecks guarded by Bots. Basic Oxygen Tank upgrade: When you reach the first Engineering ship, exit and fly upwards.Break open all of the cardboard containers. Suitcase: Go to the Post Office wreck behind and to the left of the starting ship.Grabber Blueprint: Pick up the Back-Scratcher in the starting ship.Lead Paint: Towards the Red Paint area – use the Smuggler’s eye to open the nearby locked box.There should also be some ‘Yellow Water’ nearby which is required to make the first two accelerator items. First Accelerator: Head out of the ship, turn right and head towards a small wreck in the Coolant area, and pick up a “Schwarma” item.Flashlight: Head straight out of the first ship, and head a little down and to the right – there is a corpse with a flashlight blueprint.Advanced Balloon: Towards the center of Chapter 1 there is a floating kindergarten area.Basic Balloon: When you exit your starting ship – head straight down to the wreck below your ship, and inspect the inflated Balloon.Items, Compartments, and Modules Locations for Breathedge CHAPTER 1 If you feel that it is lacking in information, do let me know in the comments. The detailed guide consists of Chapters (1-3), Vehicles, Base Buildings, and Modules. In this guide for Breathedge, we will go over the locations for Item Blueprints, Modules, and Compartments.


 0 kommentar(er)
